
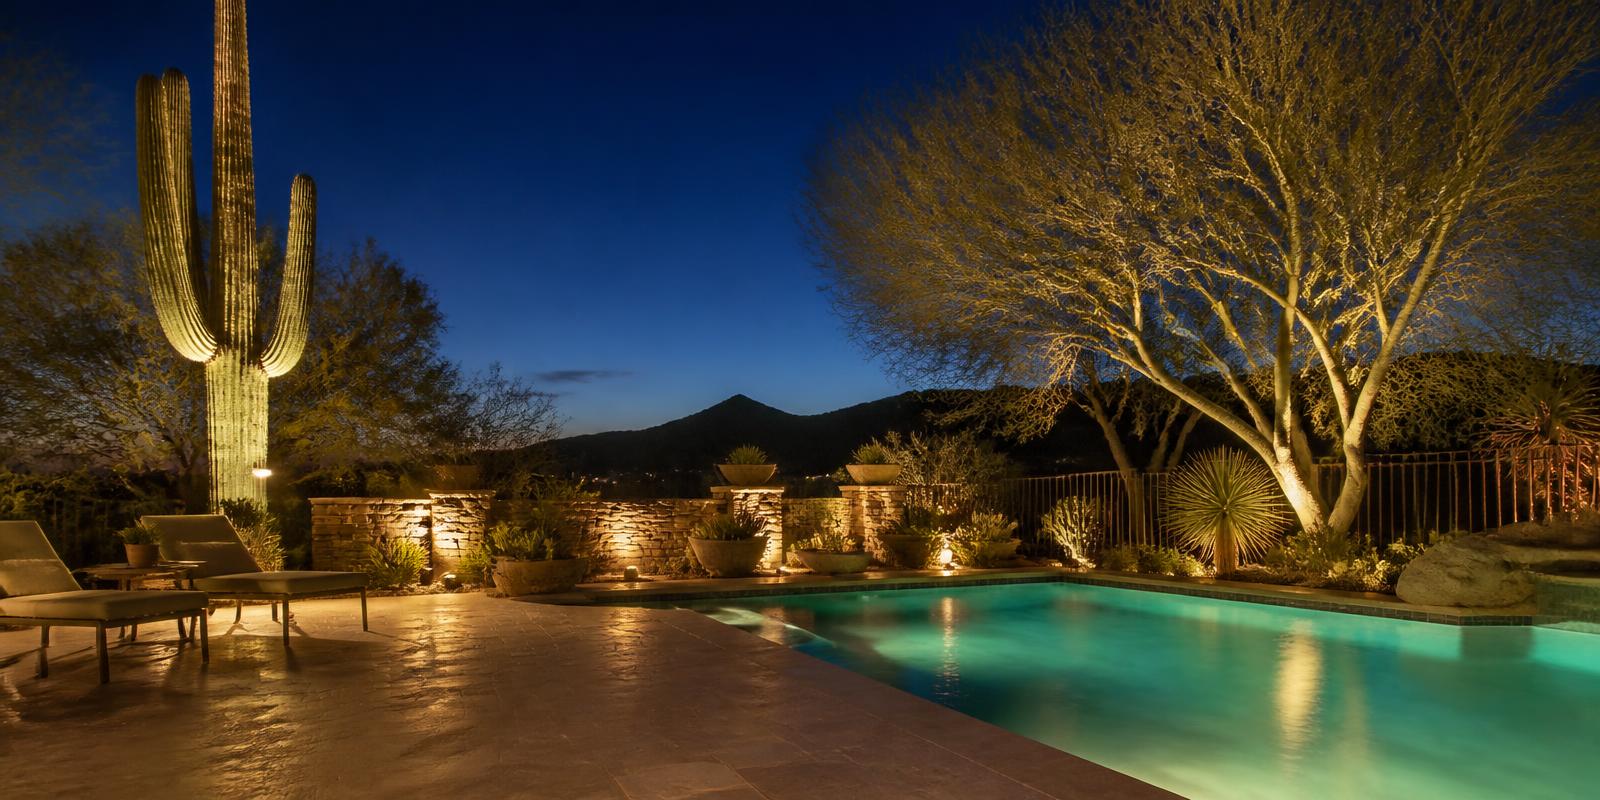
Most disappointing lighting installs in the Valley aren't the result of cheap fixtures. They're the result of no design step — someone placed path lights every eight feet, pointed a flood at the house, and called it done. A real lighting design decides what the yard should look like after dark first, and picks hardware second.
Here's the sequence AE follows, and the Arizona-specific factors that change the answers at each step.
Step 1 — The night walk
Lighting design starts after sunset, on the property, with the existing lights off. Daytime walks miss the things that decide the plan: where ambient spill from a neighbor already lands, which sightlines matter from inside the house, where the grade actually falls, and which trees have a canopy worth lighting through.
The output of the night walk is two lists — what should be lit, and what should intentionally stay dark. The second list is what makes a yard feel designed rather than floodlit.
Step 2 — Choose the focal points
A yard can only have a few focal points before everything competes. In Arizona the strongest candidates are usually mature specimen plants and architecture: saguaro, palo verde, mesquite, olive, and palms, plus stone walls, columns, ramada structures, and water features.
Everything else — paths, steps, seat walls, planting beds — is supporting light. Supporting light should be dimmer than the focal points, not equal to them.
Step 3 — Layer the techniques
- Uplighting: a well or bullet light at grade aimed up into a tree or cactus. This is the signature desert technique and the highest-impact dollar in most yards.
- Downlighting / moonlighting: fixtures mounted high in a canopy, ramada, or wall, washing light downward. It's the most natural-looking layer and the best tool for usable, glare-free brightness over a patio or dark corner.
- Grazing: a fixture placed close to a wall and aimed along it, revealing the texture of stone veneer, block, or stucco.
- Path and step lighting: shielded, low, and spaced irregularly to follow the landscape — not lined up like an airport runway.
- Water and pool lighting: pool lights, water-feature accents, and deck perimeter light, scened together with the rest of the yard rather than run on a separate switch.
Step 4 — Zone it, then plan the scenes
Zoning is what makes lighting usable year-round. Most Valley yards land between three and six zones — entry and drive, pool and deck, ramada or outdoor kitchen, trees and cactus, and path or perimeter.
From those zones you build scenes: a full entertaining scene, a lower late-evening scene, a minimal overnight or security scene, and often a holiday or event scene. Same fixtures, four completely different yards.
Step 5 — Specify fixtures for Arizona conditions
This is where the desert is unforgiving. Between UV exposure, 150°F+ surface temperatures, monsoon dust and water intrusion, and hard-water irrigation overspray, budget aluminum and composite fixtures typically fail here in a few summers. AE specifies commercial-grade brass and copper bodies from lines engineered for this environment — FX Luminaire, Kichler Pro, Vista Pro, Hinkley, and Brilliance LED.
Lamp choices matter as much as fixture bodies: warm white at 2700K–3000K for most applications, amber where dark-sky or wash-adjacent conditions call for it, and beam angles chosen per plant — narrow spots for a saguaro's vertical form, wider floods for a broad mesquite canopy.
Step 6 — Size the transformer and route the wire
The unglamorous engineering step that determines whether the system still works in year ten. It covers transformer capacity with headroom for future fixtures, wire gauge sized against run length so distant fixtures don't dim, hub or home-run wiring layout, and sleeving under hardscape.
If a paver deck, pool shell, or driveway is being built, sleeves go in during construction. Running conduit under finished travertine later costs many times more than roughing it in early.
Step 7 — Check codes, dark-sky overlays, and HOA rules
Arizona has more outdoor lighting regulation than most states, and it varies by municipality. Cave Creek, Carefree, Fountain Hills, and parts of North Scottsdale enforce dark-sky standards covering shielding, aim angle, and color temperature. Paradise Valley enforces fixture shielding and light-trespass standards. Guard-gated communities such as Silverleaf and Troon add design-review submittals on top of town code.
Practically, that means full-cutoff fixtures, warm lamps, beams aimed below horizontal, and fixture cut sheets prepared for submittal. It's far easier to design to those constraints up front than to re-aim and re-lamp a finished system after a review comment.
Step 8 — Install, then aim at night
Installation is the middle of the process, not the end. The step that separates a good system from an ordinary one is a dedicated evening after install to aim every fixture by eye: pulling glare out of sightlines, softening hot spots on stucco, and rotating well lights until a saguaro's ribs read correctly.
Controller scheduling and scene programming happen the same evening, so the homeowner leaves with scenes already set rather than a menu to figure out.
Step 9 — Plan for maintenance
Desert lighting drifts. Dust films lenses, monsoon winds shift aim, irrigation and plant growth block beams, and trees outgrow their original fixture placement. An annual clean, re-aim, and re-trim visit keeps a system looking like the day it was commissioned, and is the difference between fixtures that last two decades and fixtures that look tired in three years.
Arizona-specific considerations, summarized
- Heat and UV: brass and copper fixture bodies, not aluminum or composite.
- Monsoon: proper drainage at well lights, sealed connections, and transformer placement out of the splash zone.
- Dust and hard water: expect lens cleaning as routine maintenance, especially near irrigation heads.
- Dark-sky overlays and HOAs: shielding, aim, and color temperature are often regulated — design to them first.
- Desert plant material: saguaro, ocotillo, and agave need standoff distance and appropriate beam angles; a fixture set too close is both a heat and an aesthetic problem.
- Wildlife and washes: amber lamps, shielded fixtures, and motion control near natural washes reduce disturbance.
- Outdoor season: the Valley lives outside from October through May and after dark all summer, so lighting carries more of the usable-hours load here than in most climates.
Sample outdoor lighting layouts by yard type
Four layouts we design most often in the Valley. Each one shows where light belongs, which fixture types do the work, and how the layout is usually zoned.
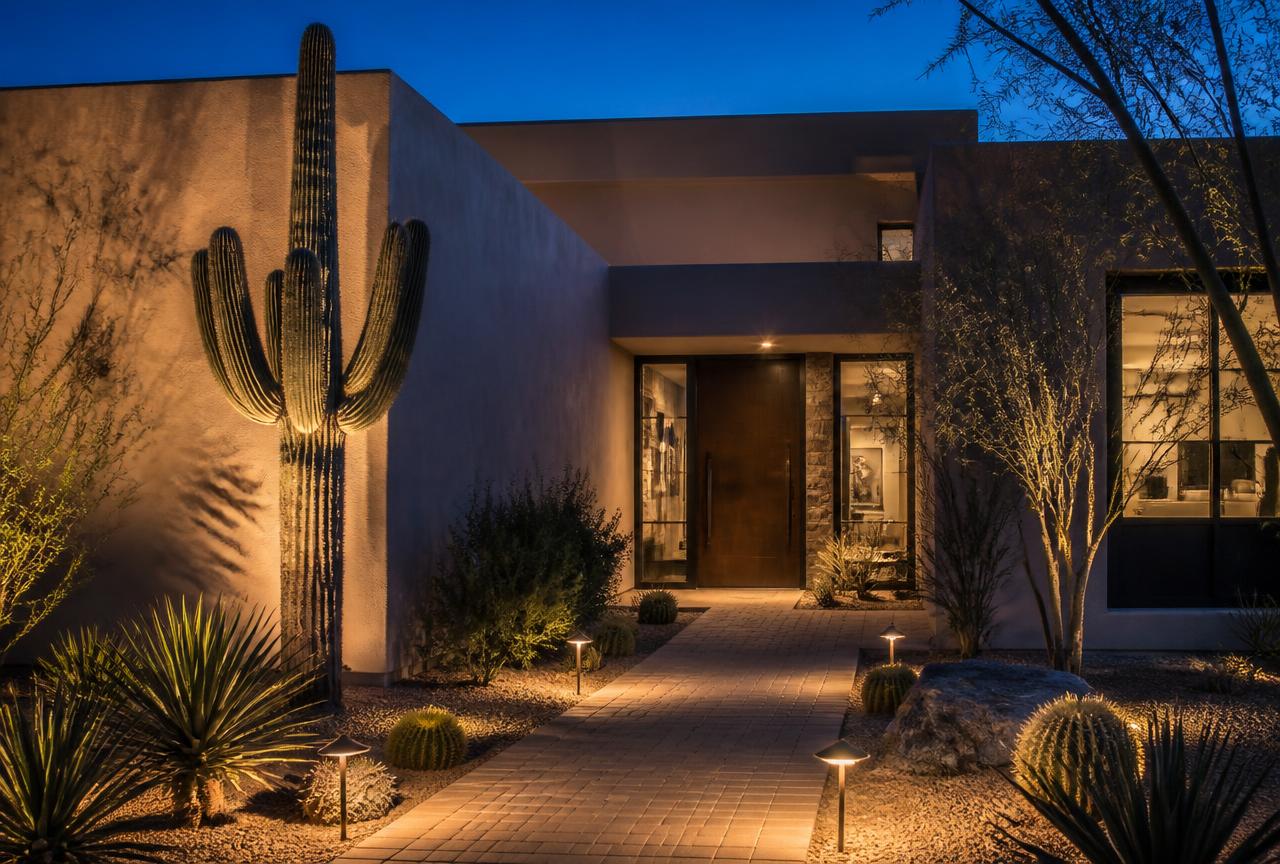
Front entry
The goal is a clear, welcoming arrival sequence: guests should read the walkway, the step changes, and the front door without a fixture ever shining in their eyes.
What's in the layout
- One soft downlight or sconce pair at the door for the brightest point in the layout
- Low path lights staggered along the walk — spaced for overlapping pools, not a runway
- Two or three uplights on architecture or a specimen cactus to give the facade depth
- Shielded step and wall-wash fixtures wherever grade changes
Typical layout on a standard front yard: roughly 8–14 fixtures. Keep everything on one warm color temperature so the stucco doesn't read green or blue next to the door light.
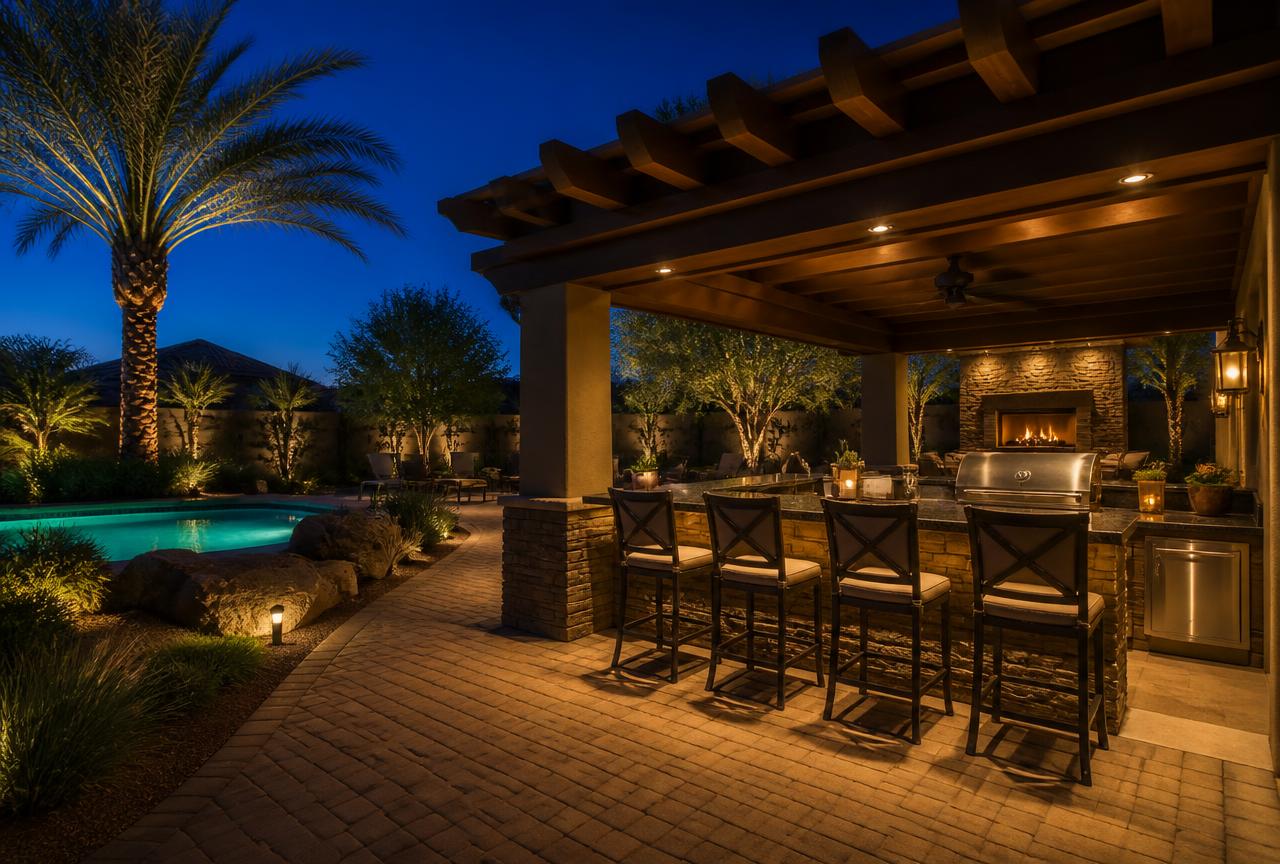
Backyard entertaining
Entertaining areas need task light where people cook and gather, and much lower ambient light everywhere else so the space still feels like evening.
What's in the layout
- Dimmable downlights in the pergola or ramada over the grill, island, and bar seating
- Under-counter or toe-kick light on the island so the patio reads safe without glare
- Pool and water-feature lighting as the visual anchor at the far end
- Perimeter uplights on palms, walls, and planting to push the boundary outward
Split this into at least two zones — a bright "cooking" scene and a low "conversation" scene — so one control change resets the mood instead of turning everything on at full output.
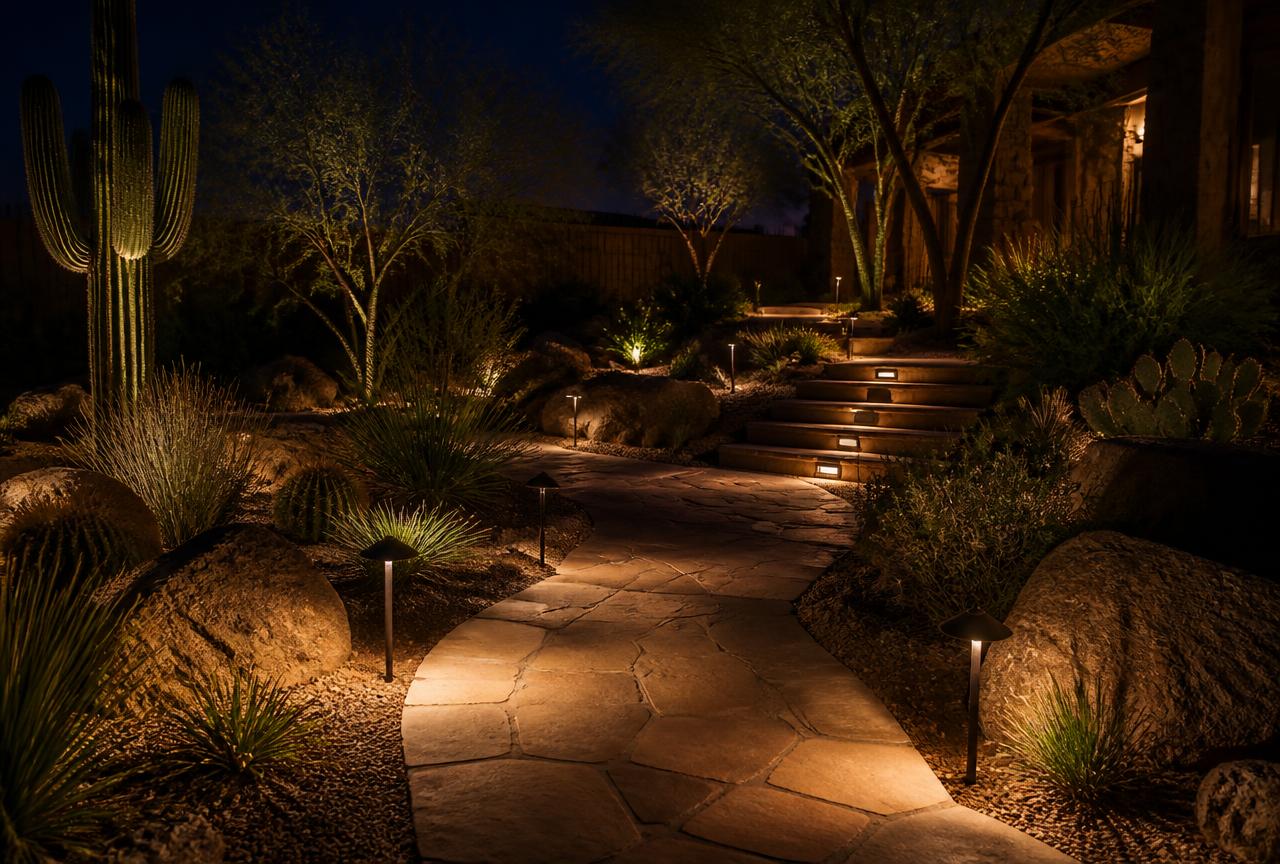
Pathways and steps
Circulation lighting is safety first. It should mark direction, edges, and elevation changes with the least light that does the job.
What's in the layout
- Path lights staggered side to side on curves so the eye follows the walk's shape
- Dedicated step lights or hardscape lights at every riser and retaining wall
- Grade-level lighting near gates, hose bibs, and equipment access
- Motion-controlled fixtures on side yards and service paths
Spacing matters more than fixture count: pools of light should just touch, not form a continuous strip. Set fixtures back from the paving edge so they survive foot traffic and landscape maintenance.
Accent and focal lighting
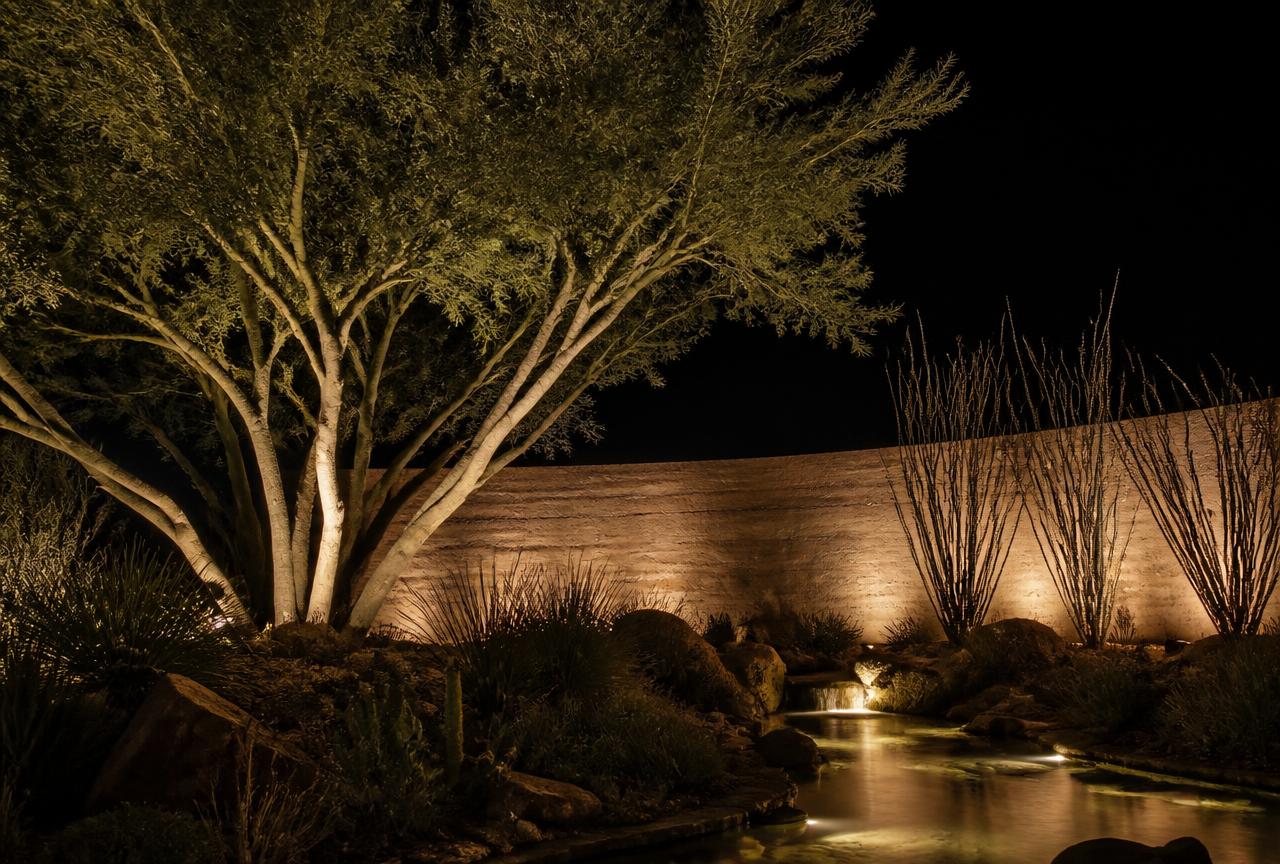
Accent lighting is what makes a yard look designed rather than lit. It's aimed at a short list of things worth looking at after dark.
What's in the layout
- Two-angle uplighting on specimen trees to show structure instead of flattening the canopy
- Grazing light close to a wall to reveal texture on block, rammed earth, or stone
- Silhouette and shadow effects using ocotillo, agave, or sculpture against a wall
- Low-output light in water features, fire elements, and planters as secondary interest
Pick three to five focal points per yard. Beyond that, the accents compete with each other and the layered effect flattens out.
Images are design references that illustrate layout and fixture placement, not photographs of a specific AE Outdoor Living project. Fixture counts, zoning, and placement are confirmed on site.
Build your low-voltage lighting system
Answer four quick questions and we'll show the component categories a system like yours typically needs — fixtures, power, wiring, controls, and compliance items. It's an educational planning tool, not an engineered plan or a quote.
Pick at least one area to lay out a system.
See it on your own yard first
If you're still deciding how much lighting your yard wants, start with a concept. Upload a photo of your backyard to the AE Design Tool and generate a lighting-forward version of your space, then send it over — AE reviews access, plant material, code overlays, and what's actually buildable before quoting. You can also read the landscape lighting service page for brands, controls, and city-specific detail.
Arizona Outdoor Lighting Plan Checklist (PDF)
A two-page, print-ready checklist that walks the same sequence above — so you can plan a new lighting design or audit a quote you already have.
- Site walk and dark-corner audit prompts
- Low-voltage layout: zones, transformer sizing, wire runs, scenes
- Fixture selection specs for Arizona UV, monsoon, and hard water
- Dark-sky and HOA compliance items for Cave Creek, Carefree, Fountain Hills, North Scottsdale, and Paradise Valley
Want AE to walk your property after dark and confirm what's buildable?
Request an estimate through JobberCost ranges and timelines in this guide are general planning references. Final scope, pricing, and schedule vary by site conditions, fixture selection, wire runs, access, permitting, utilities, HOA review, and design decisions, and are confirmed through an AE Outdoor Living consultation and signed contract.